How-to
How to make photo magnets.
Four ways to make photo magnets, from magnet sheets on a home printer to a press that makes magnets you can sell. What each one costs, how big your photo needs to be, and how to fix the usual problems. We checked these prices in October 2026.
Updated
Jump to the comparison →
The short version
Four ways, side by side.
Cost per magnet is for a 2" × 2" square. Magnet sheets are the cheapest way to start. A press costs more up front, and it's what vendors use for the magnets they sell.
| Method | Cost per magnet | Look and hold | Good for |
|---|---|---|---|
| Printable magnet sheet | 6¢ to 20¢, plus ink | Flat and matte. A light hold. | Gifts, and testing a design |
| Photo print on adhesive magnet sheet | About 11¢, plus the print | Real photo paper on a thicker magnet. Bare edges. | Anyone with a photo printer |
| Glass gem or tile | About 24¢ for the magnet, plus the gem and glue | Domed and glossy. Needs drying time. | A craft afternoon |
| Magnet press | 13¢ to 40¢ in supplies, plus a press from about $295 | Metal shell, clear film, thick magnet back | Selling at markets and events |
Printable magnet sheet
- Cost per magnet
- 6¢ to 20¢, plus ink
- Look and hold
- Flat and matte. A light hold.
- Good for
- Gifts, and testing a design
Photo print on adhesive magnet sheet
- Cost per magnet
- About 11¢, plus the print
- Look and hold
- Real photo paper on a thicker magnet. Bare edges.
- Good for
- Anyone with a photo printer
Glass gem or tile
- Cost per magnet
- About 24¢ for the magnet, plus the gem and glue
- Look and hold
- Domed and glossy. Needs drying time.
- Good for
- A craft afternoon
Magnet press
- Cost per magnet
- 13¢ to 40¢ in supplies, plus a press from about $295
- Look and hold
- Metal shell, clear film, thick magnet back
- Good for
- Selling at markets and events
Way 1
Print on magnet sheets.
The cheapest way to start. You print straight onto a magnet sheet in an inkjet printer, then cut the magnets apart.
- 1
Lay out your photos
Crop each photo square and line them up in a grid. A letter sheet fits 20 magnets at 2" × 2", four across and five down.
- 2
Print one sheet at a time
Feed the sheet through the rear or manual tray, not the main paper tray. Set the paper type to heavy matte photo paper, quality to best, and turn two-sided printing off.
- 3
Let the ink dry
Leave the sheet to dry before you cut, seal, or stack it. One printing guide says to give it a full 24 hours.
- 4
Seal it if it will get handled
Spray on two light coats of clear UV-resistant spray from 10 to 12 inches away, 15 minutes apart. It stops fingerprints smudging the ink.
- 5
Cut them apart
A paper trimmer, or a rotary cutter with a metal ruler, gives cleaner edges than scissors.
Avery's 5-sheet pack costs $15.60 on sale or $19.50 regular, which works out to 16¢ to 20¢ a magnet. A 50-sheet pack from CompAndSave, about $60, brings it down to about 6¢. Ink is extra.
Way 2
Stick photo prints to magnet sheets.
If you have a photo printer, this gives you real photo paper on a thicker magnet. Self-adhesive magnet sheets, often sold as flexible magnet sheets, come cut to 4" × 6".
- 1
Print your photos
Print at 4" × 6", the same size as the magnet sheet. Each print gives you six 2" × 2" magnets.
- 2
Stick the print down
Peel the protective film off the magnet sheet and press the print carefully onto the sticky side.
- 3
Trim
Cut the print and the magnet together to the size you want.
DIYMAG's 18-pack of 4" × 6" adhesive sheets costs $11.99, so about 11¢ a magnet before the print. Total Element's sheets are 20 mil thick, thicker than Avery's 12 mil printable sheet.
Way 3
Glue photos under glass gems.
Flat-backed glass gems, about 1" across, turn small photos into domed magnets. Ceramic tiles work in a similar way at 2" × 2".
- 1
Print the photo to fit the gem
Size each photo to the gem and print it. A laser print won't smudge. If you print on an inkjet, let it dry overnight and spray both sides with hairspray. Skip glossy photo paper, because Mod Podge won't dry properly on it.
- 2
Glue it face down
Brush a thin layer of Mod Podge Gloss on the flat side of the gem, press the photo on face down, and smooth it with your fingers.
- 3
Let it dry
Leave it 15 to 20 minutes. If you glue paper over the back to finish it, let that dry overnight.
- 4
Glue on the magnet
Hot glue a magnet to the back.
Small ceramic magnets cost about 24¢ each in a pack of 50. For 2" × 2" tiles, glue the photo down with Mod Podge, let it dry, add a second coat on top, and glue a magnet to the back. Every gem and tile needs drying time, so this is the slowest of the four ways.
Way 4
Use a magnet press.
This is how vendors make the magnets they sell at markets and events. The photo sits under clear film on a metal shell with a thick magnet back, so it looks finished and holds well.
- 1
Print at the press's cut size
The photo wraps around the edge of the metal shell, so you print it bigger than the magnet. For a 2" × 2" American Button Machines press, the print is 2.717" across.
- 2
Punch or cut it out
A punch made for your press cuts each photo to the right size in one go. For rounds, an adjustable circle cutter does the same job.
- 3
Press the front
Put the shell in the first die, then your photo face up, then the clear film on top, and press. The film protects the photo.
- 4
Press the back
Put the magnet back in the second die and press again. American Button Machines says a finished piece takes under five seconds.
A steel 2.25" round press costs about $295. Square presses run about $500 to $2,200 for the press alone, more as a kit. Supplies cost 13¢ to 40¢ a magnet when you buy 1,000 sets, and about twice that or more in packs of 100. The magnet press buyer's guide compares the presses and what their supplies cost.
Photo size
How big your photo needs to be.
Print at 300 pixels for every inch and the magnet comes out sharp. Portland Button Works asks for 300 DPI on its press templates too.
| Magnet | Sheets and gems | Pressed magnet |
|---|---|---|
| 2" × 2" square | 600 × 600 | 815 × 815, for a 2.717" print |
| 2.25" round | 675 × 675 | 788 × 788, for a 2.625" print |
| 2.5" × 2.5" square | 750 × 750 | Check your press's print size |
| 2" × 3" rectangle | 600 × 900 | Check your press's print size |
2" × 2" square
- Sheets and gems
- 600 × 600
- Pressed magnet
- 815 × 815, for a 2.717" print
2.25" round
- Sheets and gems
- 675 × 675
- Pressed magnet
- 788 × 788, for a 2.625" print
2.5" × 2.5" square
- Sheets and gems
- 750 × 750
- Pressed magnet
- Check your press's print size
2" × 3" rectangle
- Sheets and gems
- 600 × 900
- Pressed magnet
- Check your press's print size
The pressed sizes are for American Button Machines presses. Other presses use different print sizes, so check your maker's template. On a pressed magnet, run the photo all the way to the outer cut line, and keep faces and text inside the inner line, because the outer part wraps around the side.
Not sure about a photo? Drop it into the DPI checker to see the biggest size it prints sharp at. For inkjet prints going into a press, let the ink dry fully first, as long as 24 hours. Moisture trapped in the ink can rust the magnet from the inside later.
Troubleshooting
Common problems and how to fix them.
The magnet sheet curls or jams
Feed one sheet at a time through the rear or manual tray, and only feed sheets that lie flat. Avery says printers with a U-turn paper path jam more often on magnet sheet. Store sheets flat, with plain paper between them.
The magnet slides down the fridge
Printable sheet is thin. Avery's is 12 mil, and Avery says it isn't strong enough to hold several sheets of paper. For a firmer hold, use 20 mil adhesive sheet, or a press magnet set, which comes with a 60 mil magnet.
The ink smudges
Inkjet ink can take up to a day to dry on magnet sheet. Let it dry fully, then seal it with clear spray.
Mod Podge stays tacky
A thick coat won't dry, so brush on a thin layer. Mod Podge also won't dry properly on glossy photo paper. Reprint on plain paper.
The photo lands off-center in a press
You printed at the magnet size, not the cut size. Use your press maker's template, and press a test sheet before a big run.
Press parts don't fit
American Button Machines says its 2.25" press doesn't take imported 58 mm or Badge-A-Minit supplies, and its 2" × 2" sets don't fit metric square presses. Buy supplies made for your press.
Selling them
Making photo magnets to sell?
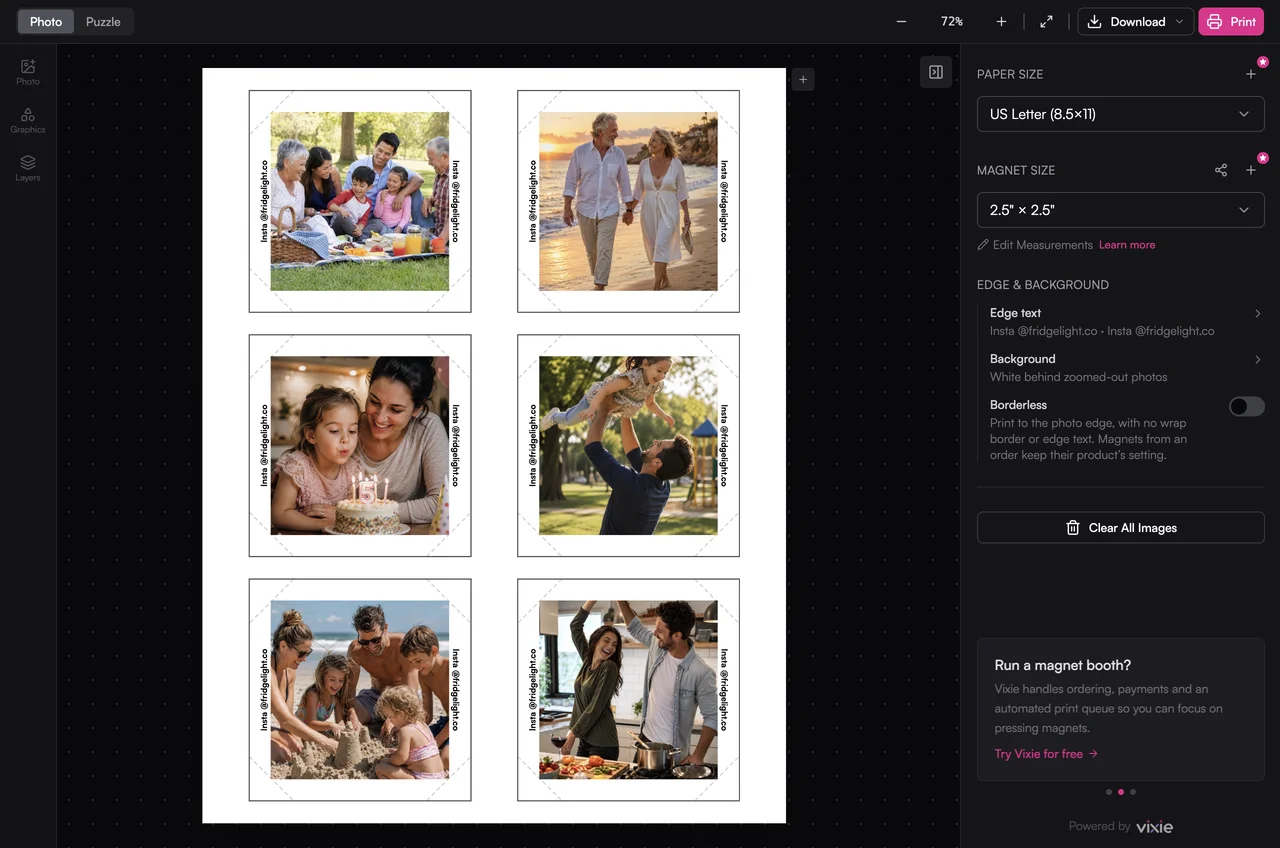
Once you have a press, the slow part is getting photos from customers and laying them out to print. With Vixie, customers upload and crop their own photos on their phones, at your booth or in your online store. Print Studio lays the orders out on a sheet, sized for your press, with cut guides for each magnet.
Questions
Photo magnet FAQ
What do you need to make photo magnets?+
How do you make photo magnets at home without a press?+
How much does it cost to make a photo magnet?+
What resolution should a photo be for a magnet?+
What paper do you use for pressed photo magnets?+
Are photo magnets safe around kids?+
Keep going
Related reads.
Choosing a magnet press
Round vs square presses, real prices, what each magnet costs you, and the size traps that jam a press.
Read more →Sizes · ReferencePhoto magnet and button sizes
Every round, square, and rectangle size in inches and mm, and which press presets fit each one.
Read more →Print resolutionWhat resolution to print photos
How much resolution a photo needs to print sharp, how to check your photo’s pixels, and the biggest size you can safely print.
Read more →Ready to sell your photo magnets?
Customers order and crop their own photos on their phones, and every order lands print-ready, laid out for your press. Plans from $29/mo, with a 7-day free trial.