Size measurements · 10 min
Dial in Vixie for your magnet press.
No two magnet machines cut at exactly the same measurement. A "2.5-inch" machine might cut at 2.503", another at 2.612", another somewhere in between. Edit Measurements is the one-time-per-size panel that tells Vixie the real cut size of your machine, so the print layout matches it exactly. Once it's dialled in, the values stay saved and your prints line up on every future order.
Why this panel exists
Why your test sheet doesn't line up — even when nothing is broken.
A "2.5-inch" magnet machine doesn't actually cut at 2.5 inches. Put a caliper on the cut and you'll see something like 2.503" — or 2.612", or 2.498". Different manufacturers tune their machines to cut at slightly different measurements. None of them are doing anything wrong. They're just landing on different numbers for the same nominal label.
That's why the same Vixie print sheet lines up perfectly on your friend's machine, but leaves a sliver of white or clips the photo edge on yours. Your machine isn't cutting at the same measurement as theirs.
Edit Measurements is how you tell Vixie the measurement your machine actually cuts at. You set five numbers once, per magnet size, and Vixie sizes the print layout — photo area, edge border, seam text, cut guides — to match your real cut exactly. After the first session you don't touch the values again unless you switch machines.
What actually varies between machines
The cut measurement. A nominal 2.5" machine might cut at 2.503" while another cuts at 2.612". The print layout has to match the real cut, not the label.
The Edit Measurements panel
Five fields, one for each thing that can be off.
Open Print Studio, pick the magnet size you're dialling in, and click Edit Measurements — it sits just below the magnet size dropdown. The panel that opens has the five values you'll work with. Teal numbers below match the numbered badges on the screenshot.
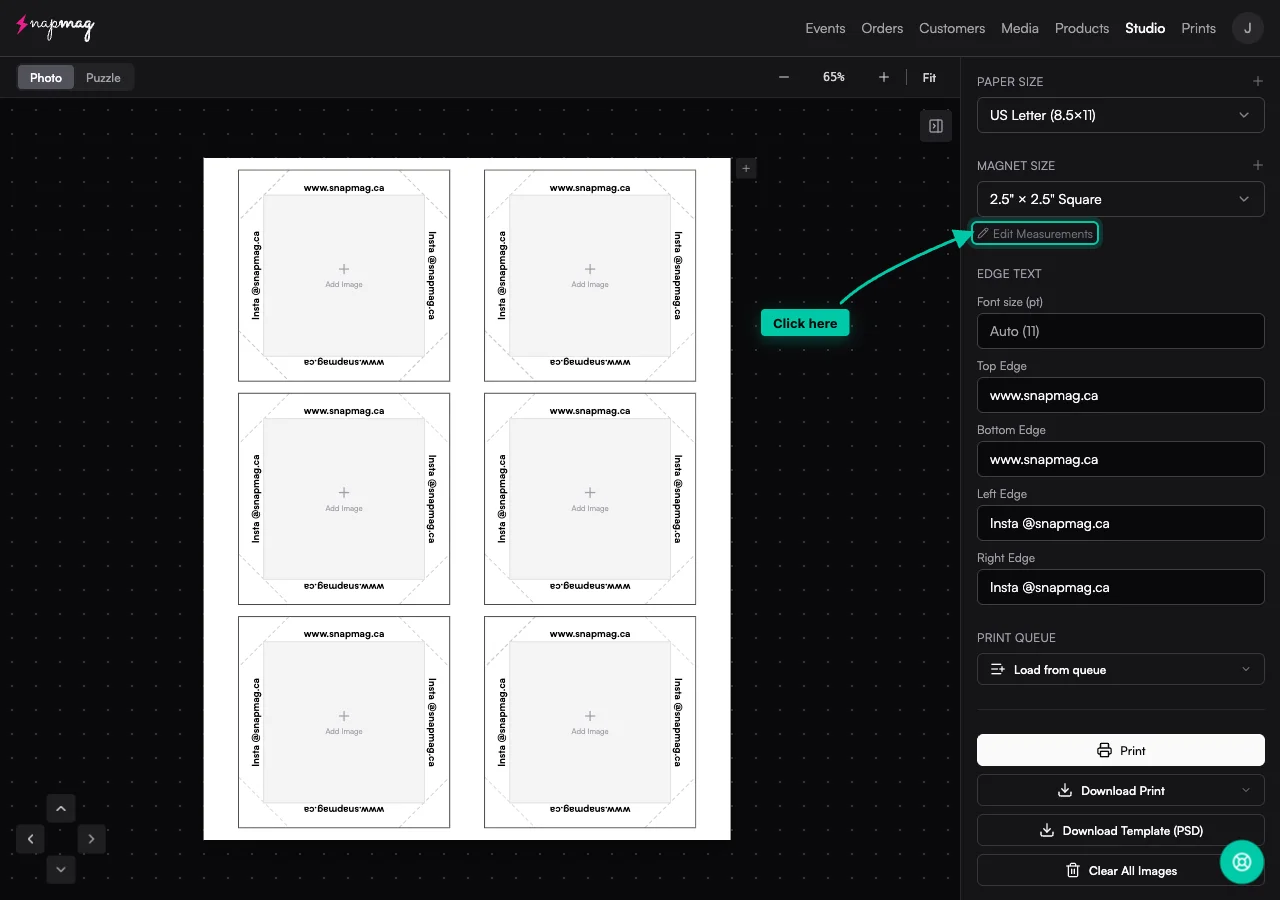
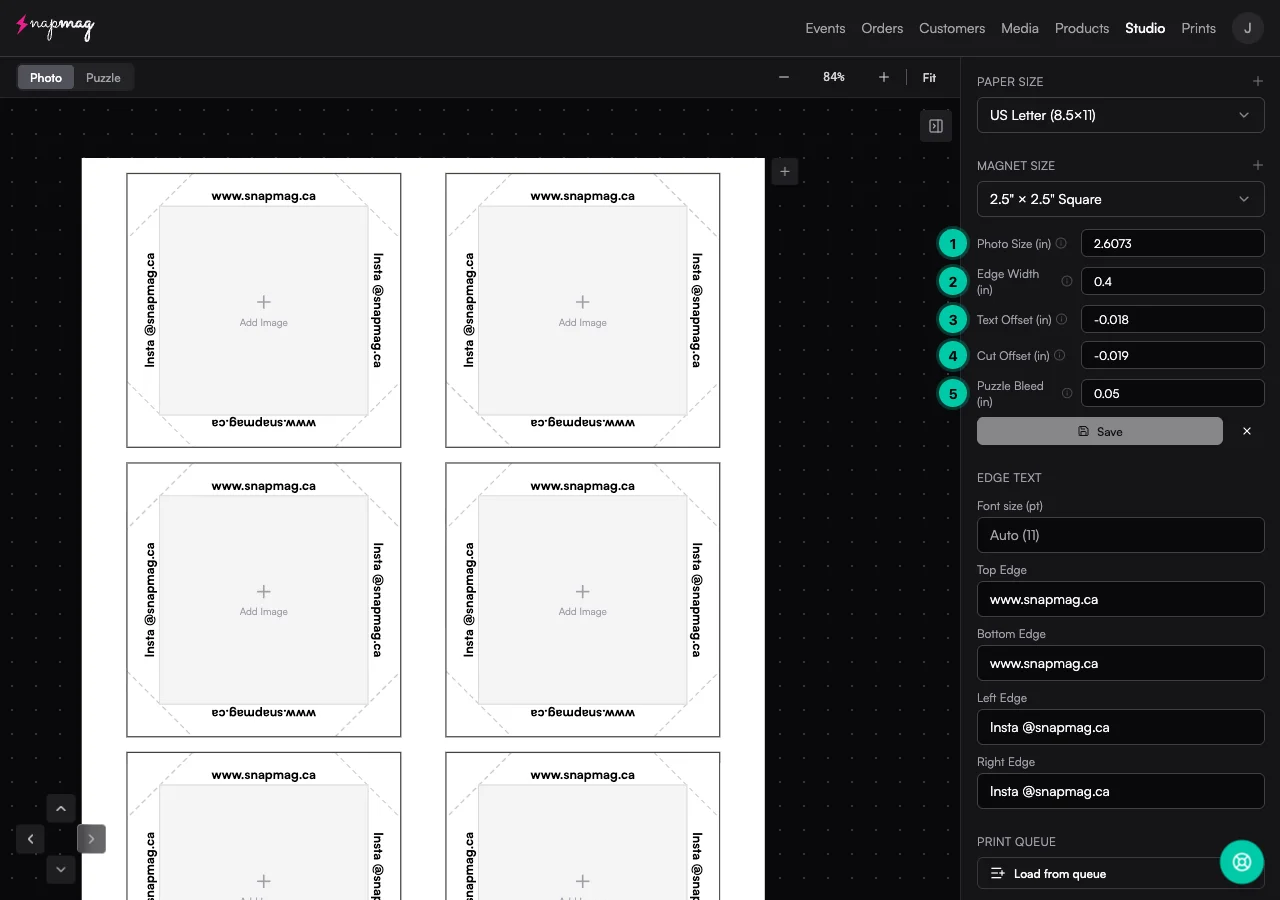
Photo Size
- Controls
- The width and height of the printed photo area inside each magnet.
- Direction
- Increase to enlarge the photo, decrease to shrink it.
- Change it when
- There's visible white space between the photo and the magnet edge — the photo isn't reaching the trim line. (A small bleed past the edge is intentional and looks clean — Vixie accounts for it.)
Edge Width
- Controls
- The thickness of the white (or coloured) border around the photo where seam text sits.
- Direction
- Increase for a thicker border, decrease for a thinner one.
- Change it when
- The border frame around the photo looks too thick or too thin compared to your finished magnet sample.
Text Offset
- Controls
- How far the seam text (your business name, hashtag, handle) sits from the magnet edge.
- Direction
- Negative values nudge text inward (toward the photo). Positive values push it outward (toward the cut).
- Change it when
- Your business name is getting clipped at the cut, or sits awkwardly far from the seam.
Cut Offset
- Controls
- The diagonal corner cuts that let the photo bleed wrap cleanly around the magnet edges. Adjusting this changes how far in from the corner those diagonal cuts sit, so the wrap folds flush instead of bunching or leaving a gap. This is the field most vendors actually tweak.
- Direction
- Negative values pull the corner cuts in toward the photo (tighter wrap), positive values push them out (looser wrap).
- Change it when
- The photo wrap doesn't fold cleanly around the magnet edges — corners bunch, leave a gap, or show a white sliver where the wrap meets the side.
Puzzle Bleed
- Controls
- The micro-gap between assembled puzzle pieces. Only appears on puzzle-magnet products.
- Direction
- Positive values tighten the gap (pieces snap closer), negative values open it.
- Change it when
- Puzzle pieces don't sit flush when assembled — visible gaps between them, or they overlap and bow.
Diagnose your test sheet
Match what you see, then nudge.
Hold the test sheet up to the press or cutter and find the row that matches what you're seeing. Most vendors only adjust one or two fields per session — there's no need to touch all five.
The 5-step measurements loop
Print, compare, nudge, repeat.
The whole loop usually takes 15 minutes per magnet size — two or three test sheets, small adjustments between each.
- 1
Open Print Studio and pick the size you're dialling in
Edit Measurements saves per magnet size, so dial in one size at a time. A 2"×2" that prints perfectly doesn't guarantee your 2.5"×3.5" will.
- 2
Click Edit Measurements and print one test sheet
Don't change the values yet. Print a single sheet at actual size (100%) with a few photos loaded so you have something to measure against. This baseline shows you the gap between Vixie's default layout and the measurement your machine actually cuts at.
- 3
Hold the sheet up to your press or cutter
Now you can see what's off. Match what you see on the sheet to the diagnostic table above and the field reference. Most vendors find one or two fields need a small nudge — not all five.
- 4
Save, print another sheet, repeat
Make small changes — large jumps overshoot and you'll be chasing the values back. Most vendors are dialled in after two or three test sheets.
- 5
You're done — for that size
Vixie remembers these values for every future print at this size, on every event, on every order. Repeat the process for any other magnet sizes you sell.
Before you blame the measurements
Printer settings come first.
If your first test sheet is dramatically off — page numbers showing, big white borders around every magnet, photos clearly clipped — that's a printer settings issue, not a measurements one. Fix these before you touch the panel.
- Print at actual size / 100% scale. "Fit to page" or "shrink to fit" rescales every magnet and nothing will line up.
- Turn on borderless printing. Default printer margins crop the sheet edges and shift every magnet inward.
- Check the driver isn't adding margins or headers. Some drivers add a "fit to printable area" by default — disable it.
- Use the right paper tray. Front-feed and rear-feed often register slightly differently on the same printer.
- Match the paper profile to the paper you're using. Wrong profile won't move things around, but it can throw off your colours — worth checking while you're in the printer dialog.
Once a clean test sheet prints — page numbers gone, no surprise white margins, magnets close to the right size — switch to the measurements loop above.
Frequently asked
Edit Measurements questions vendors actually send us.
Do I need to set up Edit Measurements separately for every magnet size?+
I switched presses. Do I have to redo my measurements?+
What if my press isn't a "standard" model?+
My first test sheet looks dramatically wrong (page numbers visible, huge margins). Is that a measurements problem?+
Keep going
Related reads.
Getting started with Vixie
Account, payments, products, branding, and your first event in about 30 minutes.
Read more →Free toolFree Print Studio
Drag-and-drop sheet layout for mixed-size and puzzle magnets — free in your browser.
Read more →Event-day · 7 stepsRunning a Vixie event
From Start event to last pickup — the order pipeline, batch printing, and walk-ups.
Read more →Ready to dial in your press?
Open Print Studio, pick a magnet size, and click Edit Measurements. Most vendors are dialled in under 15 minutes.
No credit card required. Cancel anytime.